Send Mrs. Alseri pics of your work at:
[email protected]
Check back weekly for more projects and videos. Fresh lessons will be posted at the top. *Looking for more? Check the Weekly specials slide on your classroom teacher’s page for other lesson links. Updated on Mondays!
Week of June 1st: Make your own texture rubbing plates
Copy and paste the following link into your browser:
https://docs.google.com/presentation/d/1coZvvCaIz7xTWqcq9-hxj0YKCr4fwXH9uEK0yUtrEZA/edit#slide=id.p
https://docs.google.com/presentation/d/1coZvvCaIz7xTWqcq9-hxj0YKCr4fwXH9uEK0yUtrEZA/edit#slide=id.p
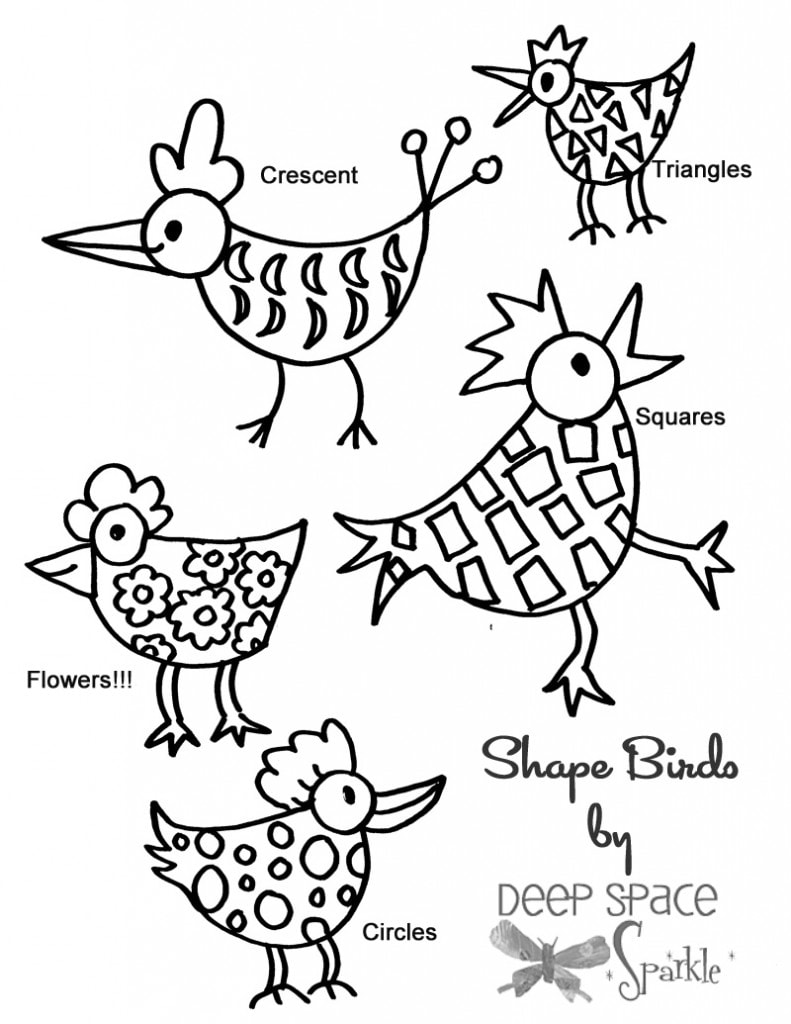
Shape and Pattern Birds
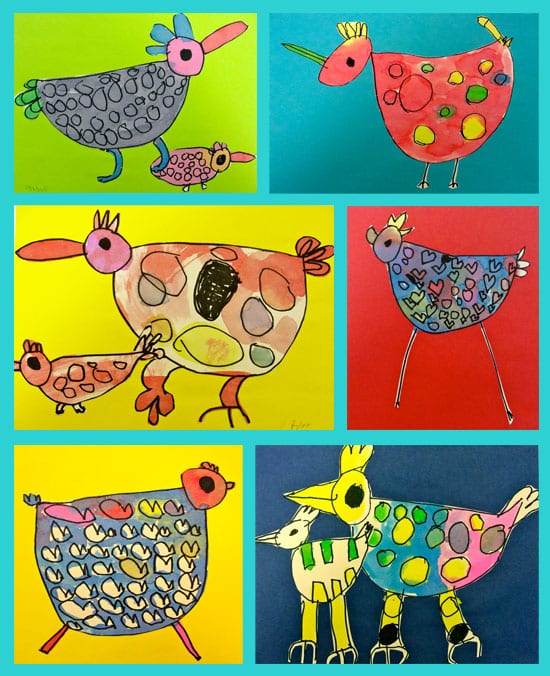
Draw birds using simple shapes and fill them up with patterns. Have any watercolor paint around? This is a great project to experiment with color. Watch the video below to start!
Save and print the handout below for ideas!
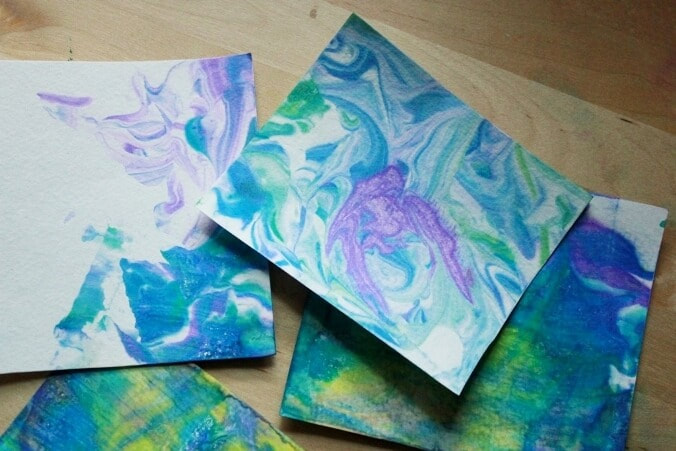
Shaving Cream Print
Supplies:
Shaving cream, any brand (I like Barbosol because you can find it at the Dollar Store)
Paper or cardstock- decide on size, longer if you want to make a card and fold in half
Paint- tempera (liquid), or food coloring in one or two colors
A stick to scrape extra shaving cream off (wooden ruler, popsicle stick, small square of cardboard)
Spoon to smooth shaving cream (or your fingers!)
Placemat or table cloth because it gets messy!
Shallow bin or dish that paper fits into- pie pans work well!
Steps:
1. Have supplies set up on table and ready to go. Spray an inch layer of shaving cream along the bottom of the bin/pan.
2. Smooth out the shaving cream a bit with your hand or a spoon.
3. If using liquid tempera paint: squeeze a few small blobs out around the shaving cream. Leave some white space in between blobs. Repeat with second or third color.
food coloring: squeeze droplets on top of shaving cream. If droplets are very small, squeeze a few right next to each other before moving to other spots. Repeat with other colors.
4. Start swirlin'! Use a stick or end of a paint brush or pencil and make swirling motions like wind around the shaving cream.
5. Press your paper on top, try not to wiggle it too much. Lift it off carefully.
6. Scrape! Use your scraper tool to remove shaving cream in one quick direction. You may do twice if needed. Set it out to dry!
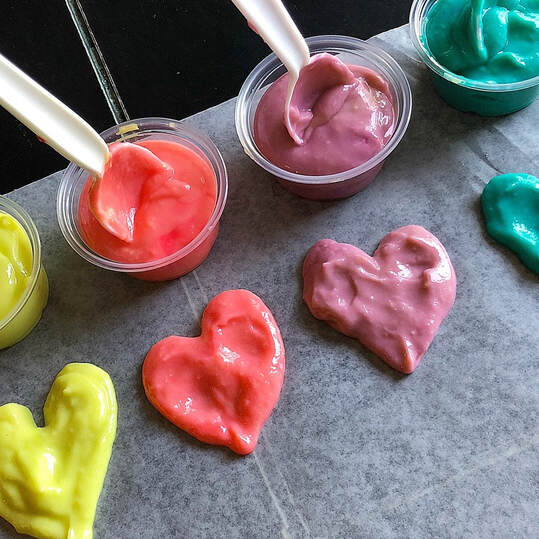
How to make your own paint
Supplies:
Vanilla Instant Pudding Mix (got butterscotch, banana or pistachio instead? Play around with different food coloring to see what happens!)
2 cups ice cold water (not milk)
Large bowl
Spoon for mixing
Food coloring
Containers for mixing paint (old muffin tin or any small plastic containers)
Paper for playing with paint
Steps:
1. Pour instant pudding mix into a mixing bowl
2. Add 2 cups ice cold water
3. Stir it up with a spoon
4. Pour into containers, let sit in fridge for at least two hours
5. Drop some food coloring into each container and stir
6.Test out your new paint with your fingers or a paint brush!
OR, if you already have some vanilla Snack Packs on hand at home, you can just add a few drops of food coloring to those and they are ready to go! No need to refrigerate or waiting time to set and they are already in their own little containers.
Shadow Drawing

These work the best on a sunny day! It feels good to get outside, doesn't it?
Supplies:
Objects from around the house
Pencil or crayon to draw with
Blank or scrap paper (a few pieces)
Steps:
1. Gather some fun toys or other things that make interesting shapes!
2. Go outside with your objects, paper and pencil/crayon.
3. Arrange your objects in a neat way on your paper. You might need to move a few different spots around your yard to be able to see strong shadows.
4. Trace the shapes that the shadows make on the paper. Don't trace the actual objects, just their shadows.
5. On the same paper or a new piece, move your objects around in a different way and trace the shadows again! What do the blobs remind you of? Do you see any cool new shapes after taking your objets off the paper? Color inside them or draw fun patterns!
Happy Snail
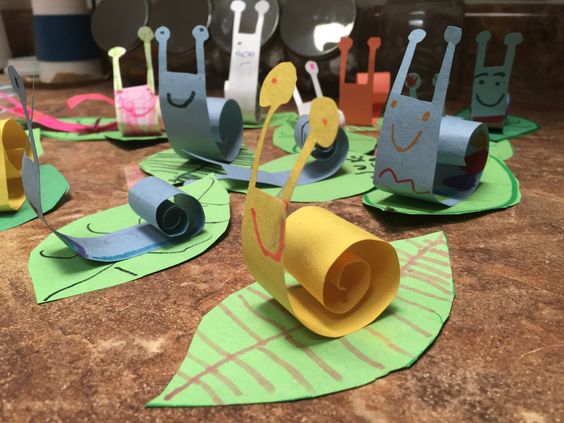
Steps
1.Cut or find a long strip of paper. Pick a fun color or choose white to color in later! It should be the length of your arm (wrist to elbow)
2. With scissors, snip a small rectangle off the bottom of the paper strip. Cut the rectangle in half to make two antennae. Set aside.
3. Roll up the colored strip like a coil. Do a few times until it keeps the shape.
4. Glue the antennae to one of the ends to make the head.
5. Draw eyes and a smile on the head, below the antennae. Draw patterns or color in your snail.
To make a leaf for your snail to sit on, cut a pointy oval out of green paper and draw some lines on in to make veins. Glue your snail on top!
Butterfly Cutout
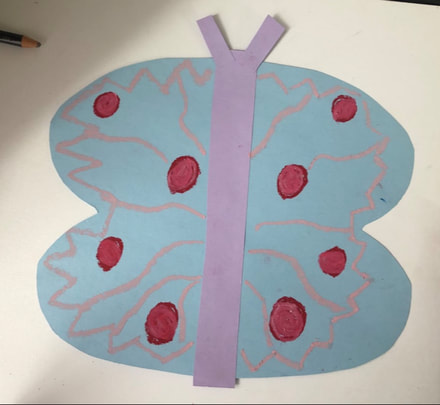
Step 1: Fold a piece of colored paper in half like a book. Keep the paper folded for steps 2 and 3. You may use white copy paper and color in later.
Step 2: Draw a large capital letter B from the top to the bottom, using the fold as the vertical line in the B. *If glue is not available, try drawing a small oval for the head at the top of the letter “B”.
Step 3: Using scissors, cut the B out but do not cut along the folded edge.
Step 4: Open up your butterfly. The wings should be the same size. Use the cut scraps or another piece of paper to make a long, thin oval or rectangle for the body and glue it to the center. Cut very small rectangles and attach to top of head to make antennae.
Step 5: Using crayons or paint, draw fun designs and shapes on the wings.
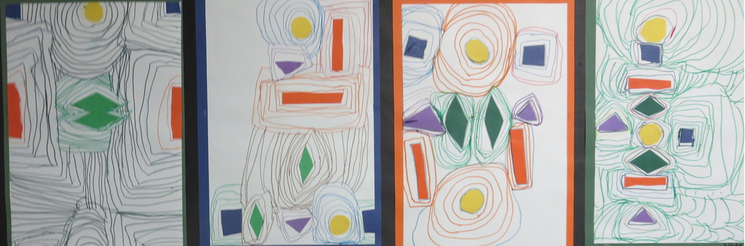
Echo Shape Collage
Supplies:
Colored paper in a few different colors
White paper for background
Glue stick or wet glue (like Elmer's)
Crayons or markers (one color or black is fine)
1. Cut out 8-10 simple shapes. Ideas include triangles, diamonds, circles, squares or rectangles. You may trace wooden blocks or draw the shapes on different colored paper before cutting out
2. Cut out a few shapes at a time. Arrange them around the white paper in a pleasing way, without overlapping. Glue them
down.
3. With a crayon or marker, trace closely around the shapes until you almost fill up the whole paper.
