Send Mrs. Alseri pics of your work at:
[email protected]
Check back weekly for more projects and videos. Fresh lessons will be posted at the top.
*Looking for more? Visit the weekly specials activity slide posted on your classroom teacher’s page. Additional lesson links are updated there on Mondays.
[email protected]
Check back weekly for more projects and videos. Fresh lessons will be posted at the top.
*Looking for more? Visit the weekly specials activity slide posted on your classroom teacher’s page. Additional lesson links are updated there on Mondays.
Week of June 1st
Draw or make texture like Vincent Van Gogh
Van Gogh is a famous Post-Impressionist artist known for his vivid landscape paintings and
portraits. He used a technique called impasto- thick layers of paint that are repeatedly layered on a surface.
Copy and paste the link below to watch the video Katie and the Starry Night by James Mayhew, read by Daddy Reads
https://www.youtube.com/watch?v=QAPjNMsSc4M http://www.viewpure.com/QAPjNMsSc4Mstart=0&end=0
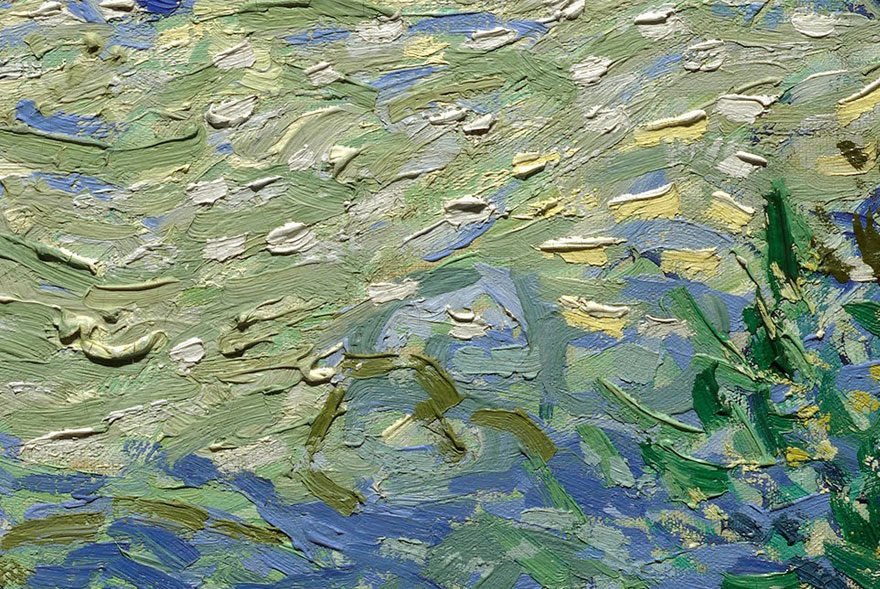
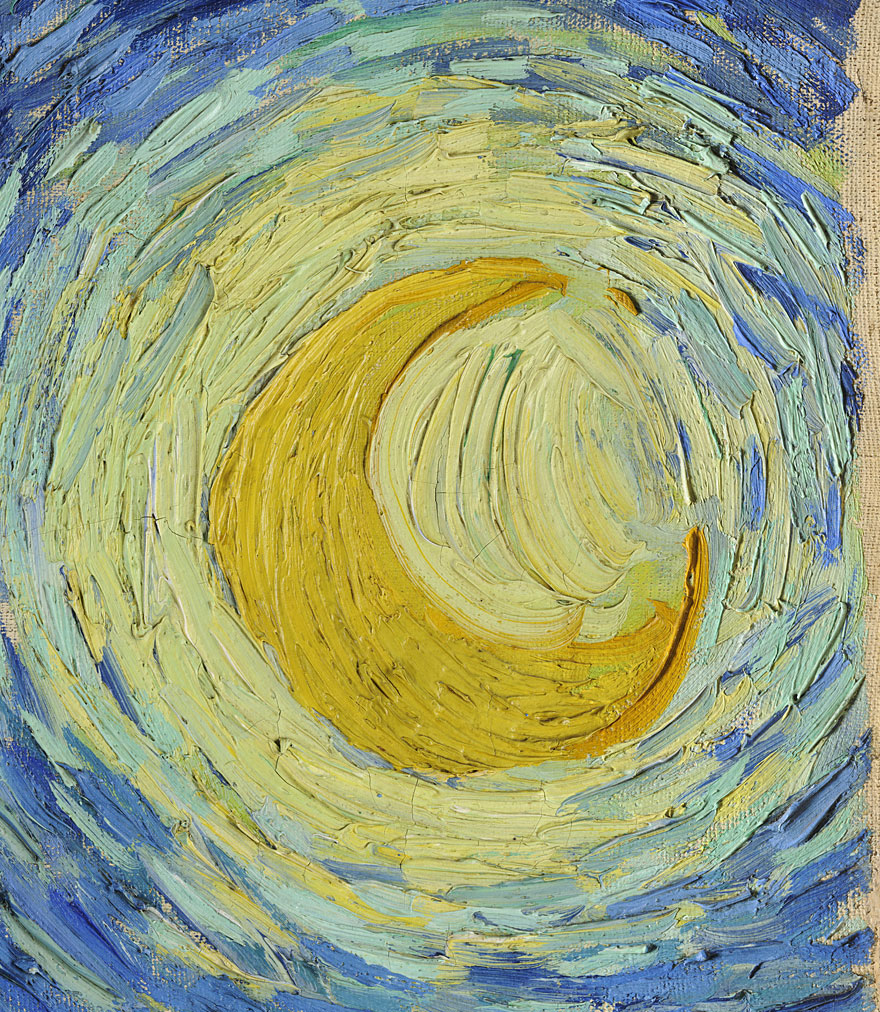
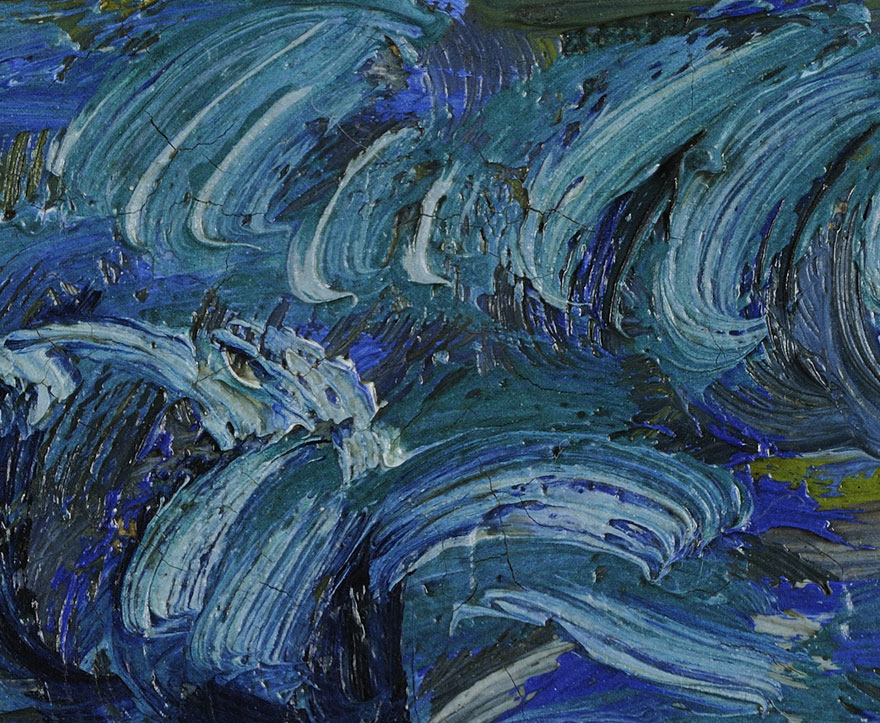
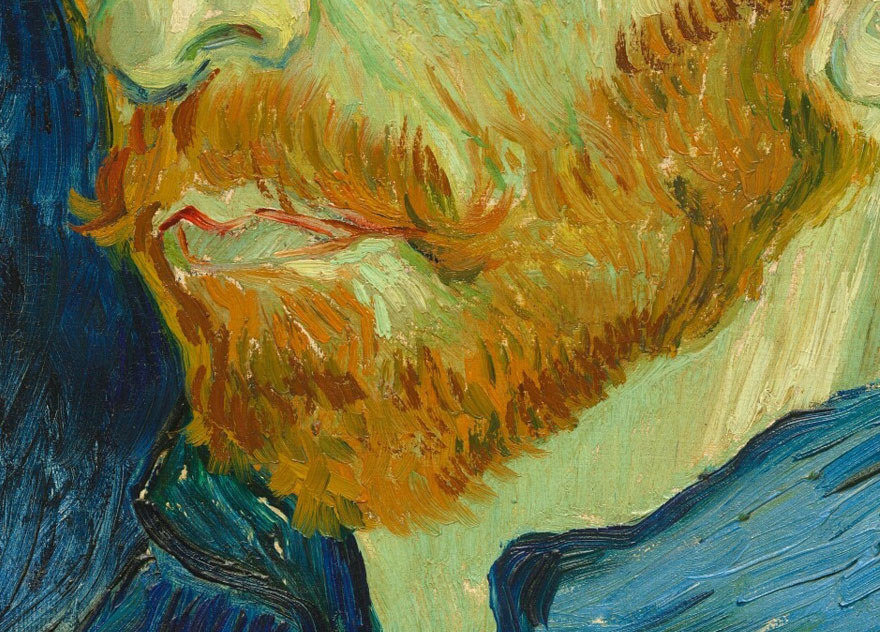
These images are actual close ups of Van Gogh's paintings. Don't you just want to reach out and touch them?!
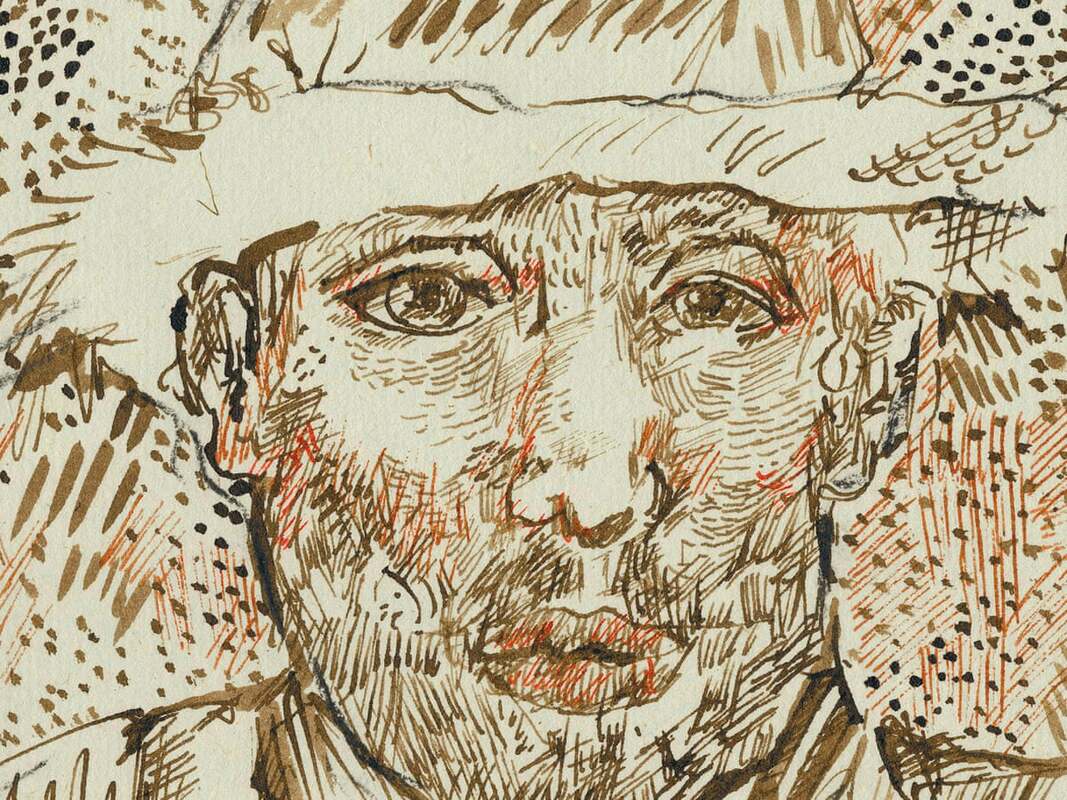
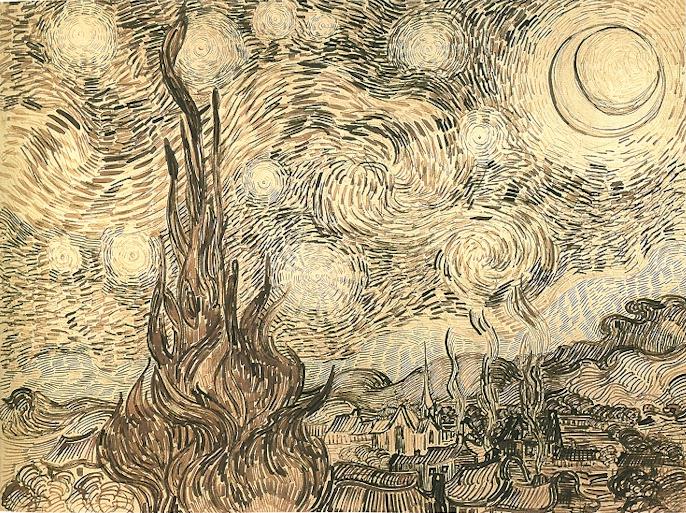
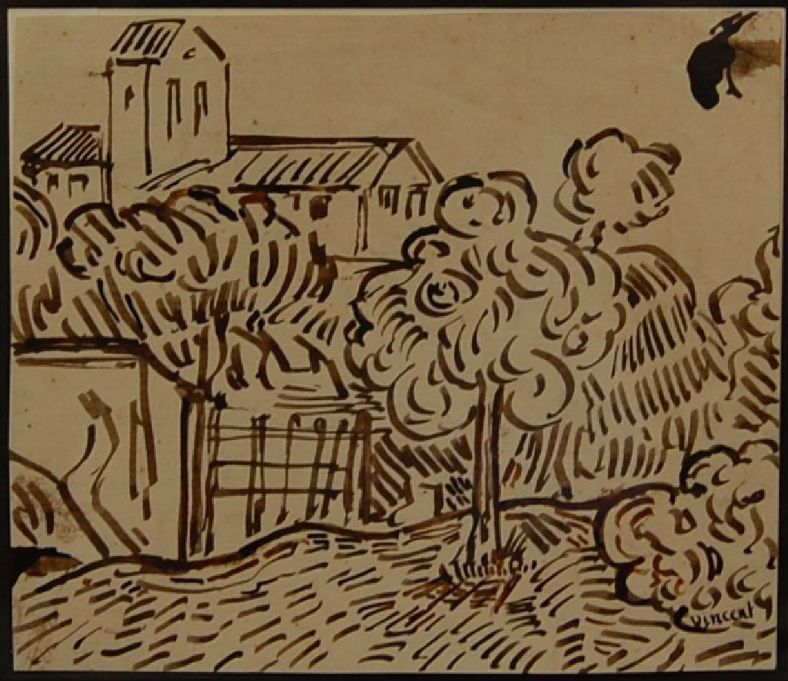
Although most people are used to seeing his vibrant, emotional paintings in color, hundreds of line drawings have been found in his sketchbooks that truly show how his use of directional lines creates strong texture. Look closely at these to see how his thick lines create movement.
Follow the steps below to create a landscape scene inspired by the lines and textures seen in Van Gogh's paintings.
Follow the steps below to create a landscape scene inspired by the lines and textures seen in Van Gogh's paintings.
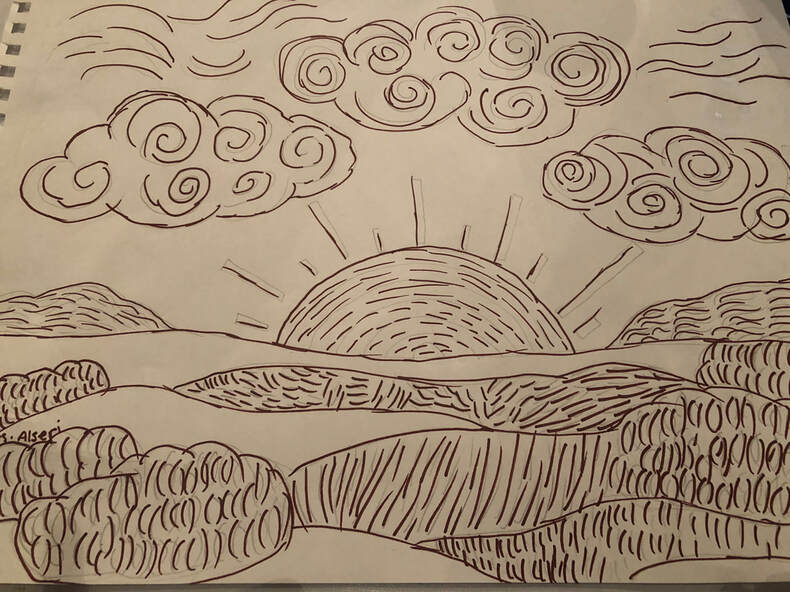
My example of a sunset. I chose to use a sepia brown marker to cover my pencil lines to show you that you don't always need a lot of colors to create a finished work of art. Use what you have!!!
Supplies
Blank white paper
Pencil
Eraser
If available- crayons, oil pastels or thick markers
OR modeling clay, Play Dough or other sculptable material
Steps (as seen in the video above):
To create a landscape with space and depth, you need to have a foreground, middle ground and background.
1. Hold your paper long. Draw/make a horizon line a little bit below halfway so you have more sky than ground.
2. Add some hills to your ground with long curvy lines. Make a few of them to create more space in your picture.
3. Move up to the sky to create the background. Decide if you are going to draw clouds, a sun or even a moon like the one in Starry Night. Draw some clouds across the sky, maybe even going off your paper.
4. Now that you have hills and a sky, add in some trees or shrubs to make your landscape more interesting. Look at the trees closely in the images above.
5. Once you are happy with your drawing, you are going to start drawing thick, directional lines through each shape and area with crayons, markers or pastels. Choose colors that go along with the object you are drawing and don't be afraid of using multiple colors in one area. Leave some space in between each mark but keep going until your entire paper is covered with lines.
If you are doing this lesson in clay or dough, make the largest parts first such as the hills, sky and trees and then use smaller pieces of dough rolled in your palm as the directional lines.
Week of May 25th
Make a drawing out of circles. It's so calming! Lesson on weekly specials slide available on classroom teacher's page.
Week of May 18th
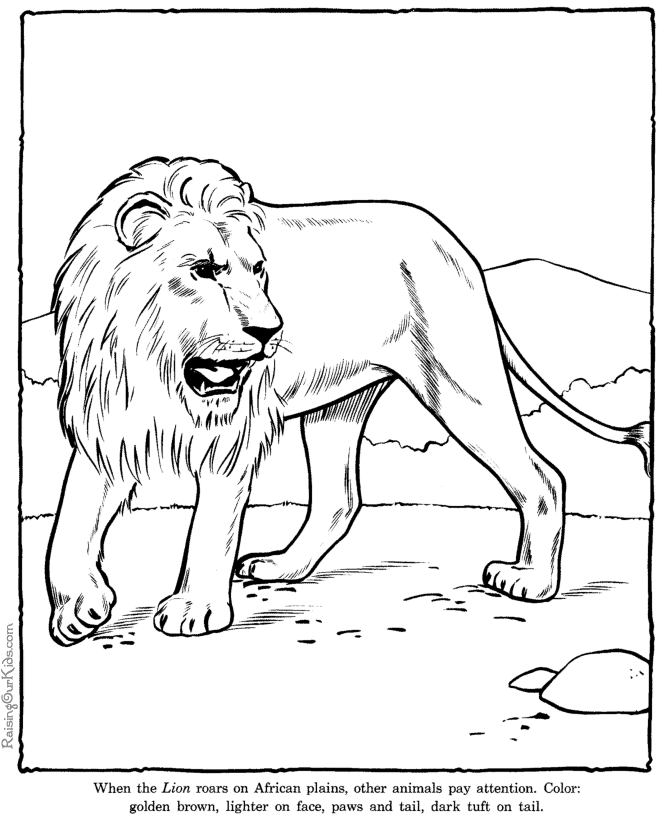
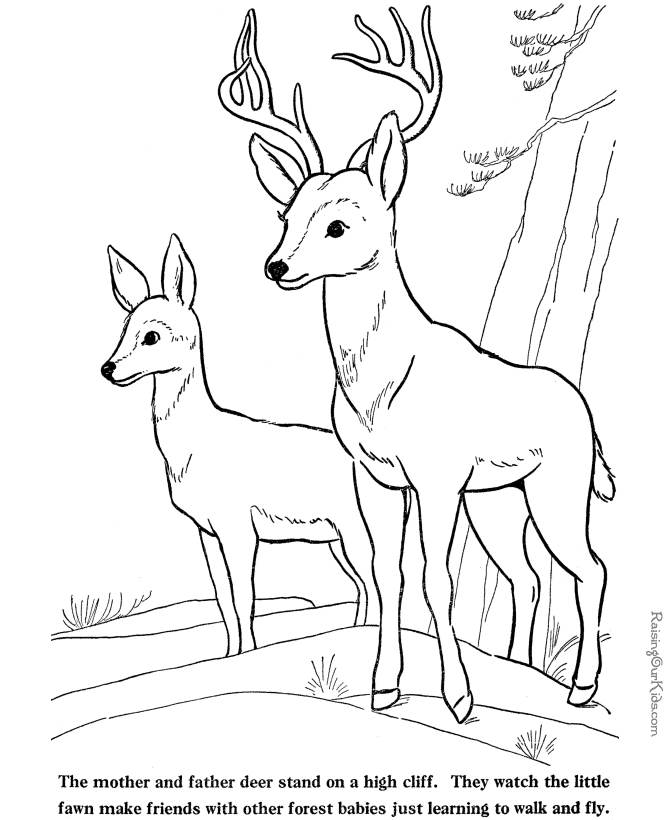
Make a drawing of an animal and its habitat.
Review- what is a habitat? Watch the video below.
Illustrator Daniel Mackie is an ex-Photoshop artist who turned to watercolor painting when searching for ways to make colors more vivid in his art. “Photoshop was making me cut corners and it was driving me crazy with its flat colors. Once I started using watercolour it became instantly clear to me that one of the reasons I was becoming so frustrated with my work was that I never had to make a solid decision. I could always undo something. When you’re using watercolor, you can’t undo it. You have to be brave, and as a result your decision-making gets better.”
Instead of drawing animals in their habitats, he draws the habitats inside of the animals. The results are beautiful, patterned illustrations that tell a story about the animal's natural environment.
Lesson: Draw an animal and fill its shape with patterns from its habitat.
Supplies:
Paper
Pencil
Black Marker or Sharpie
Watercolors if available, crayons or colored pencils
Paint Brush
Water cup
You can also color in with markers and use water and a paint brush to turn the marker into paint
*Tip: Although it's always a better idea to draw something rather than trace it (trust me, it's worth the hard work in the long run), you can do this lesson by drawing on an animal coloring page (one with a large picture!) or trace the outline of a picture of your animal and then hand draw the habitat inside the animal. If you're stuck or having a hard time, that might be a good place to start! I added some below to get you started. Remember, you are drawing the habitat on the animal, not behind or around.
Steps:
1. Choose an animal that is simple to draw (real, not mythological!)
2. Draw just the outline of it as big as you can on your paper. If using copy paper, try to make your animal's head reach the top and feet reach almost all the way to the bottom. This will give you the most room for your patterns!
3. Before thinking about habitat, draw a few details like the face, some lines for the legs and arms, ears and claws on the paws.
4. Where does your animal live? Look at the examples again in the pictures above. Think about how you can draw different types of vegetation in sections of your animal. Try to draw as many different parts of the habitat as you can- plants, water, types of trees and flowers. Draw big so that you fill up the entire animal's body! It's going to look SO COOL.
5. Outline the animal body and patterns with a black marker to make them stand out if you wish.
6. Color in all of the patterns and backgrounds or paint them with watercolors.
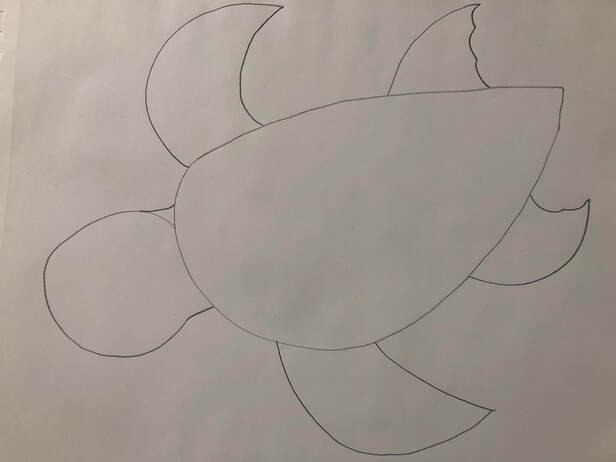
Step 1: After choosing your animal and looking at a picture, draw a large outline of it- as big as you can fit it on your paper!
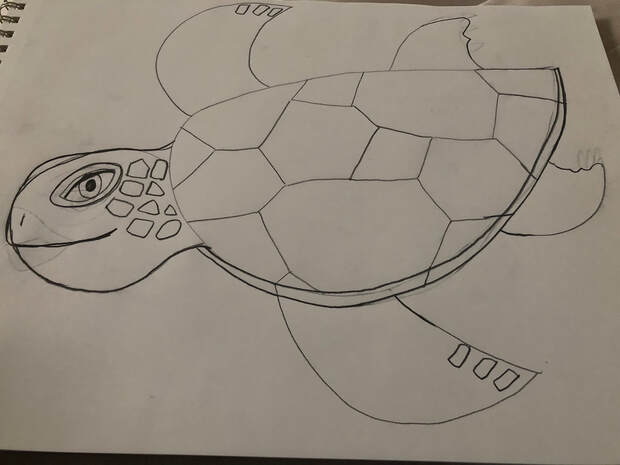
Step 2: Add some details such as the face and a few lines that help define what type of animal it is. Keep this part very simple so you have room to draw more patterns inside- I had a hard time telling myself to stop!!
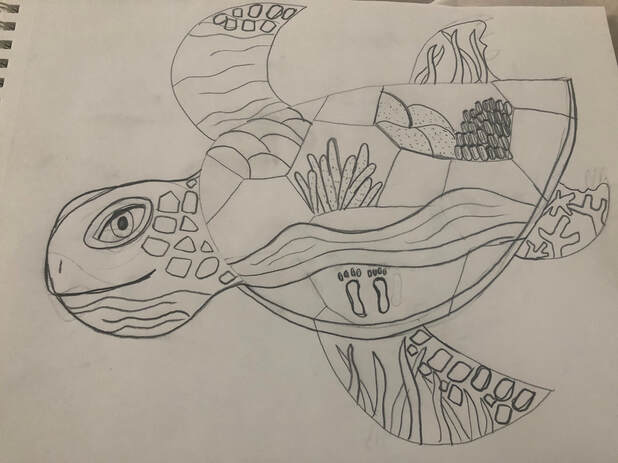
Step 3: After using Google Search to find out more about where sea turtles live, I started to draw parts of its environment around the inside. I learned about three different types of coral in the ocean!
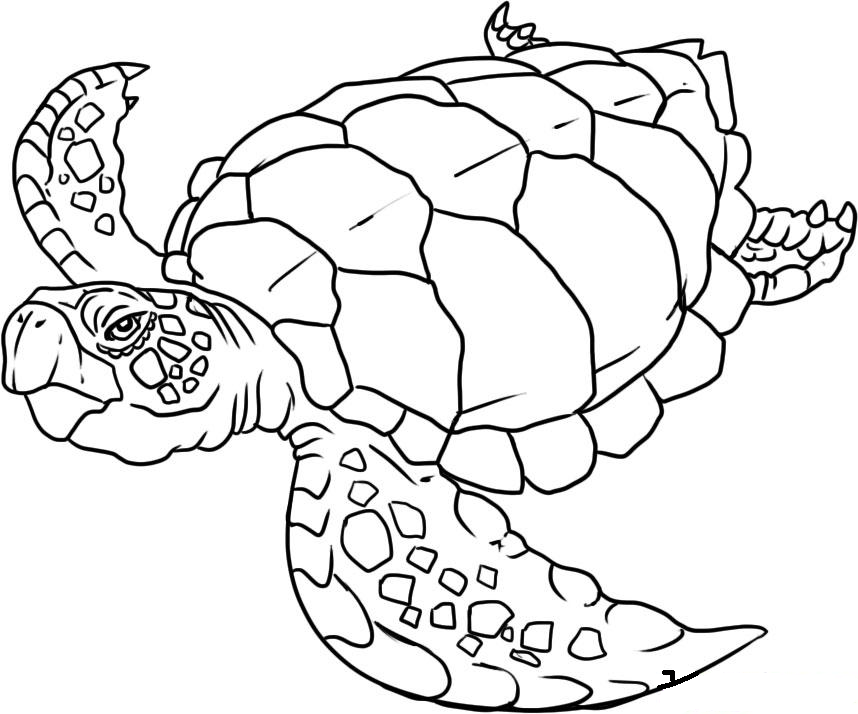
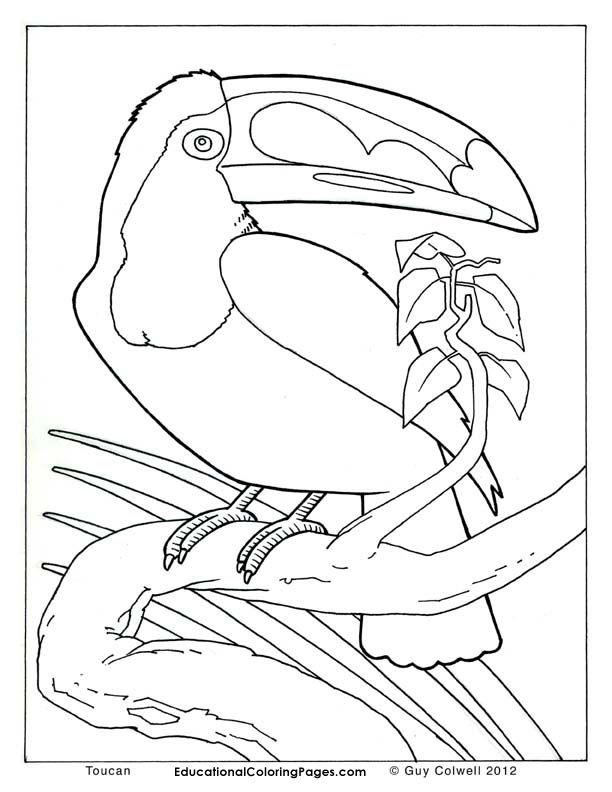
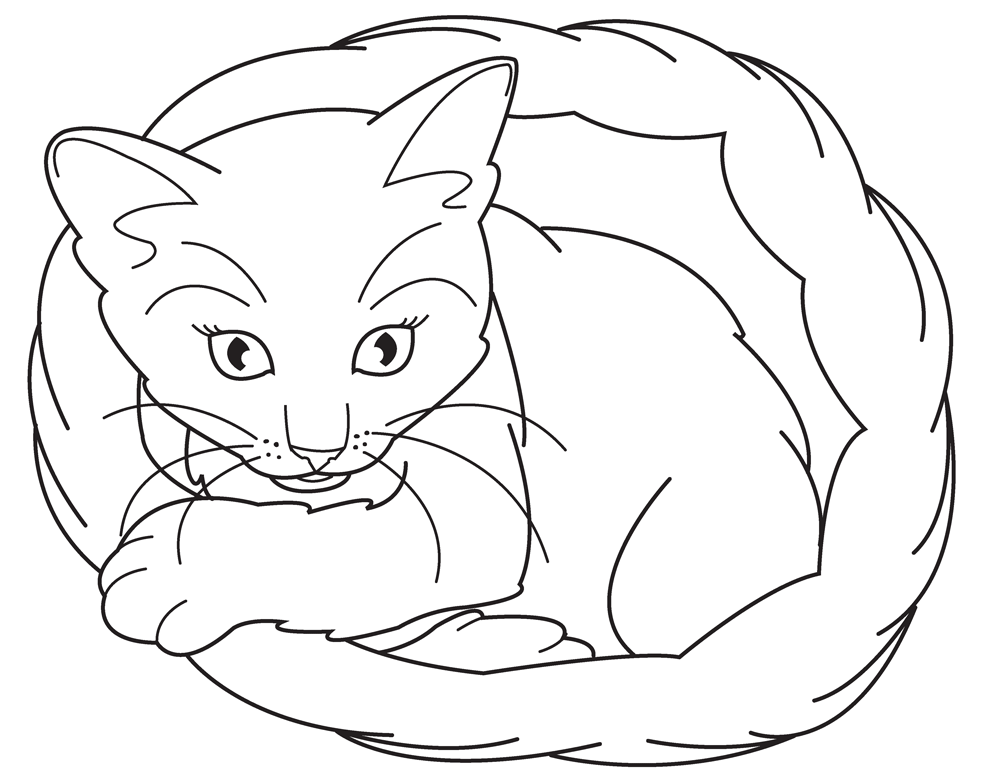
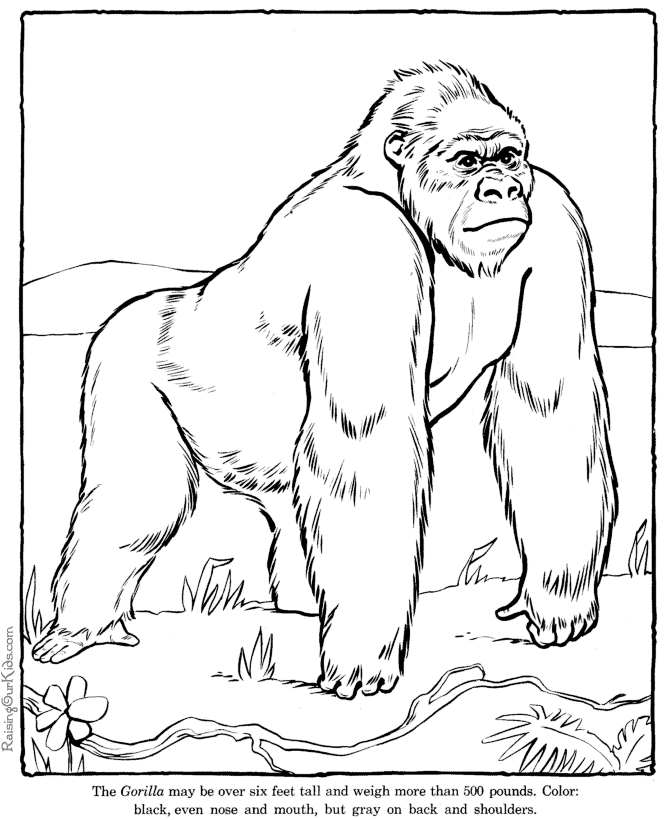
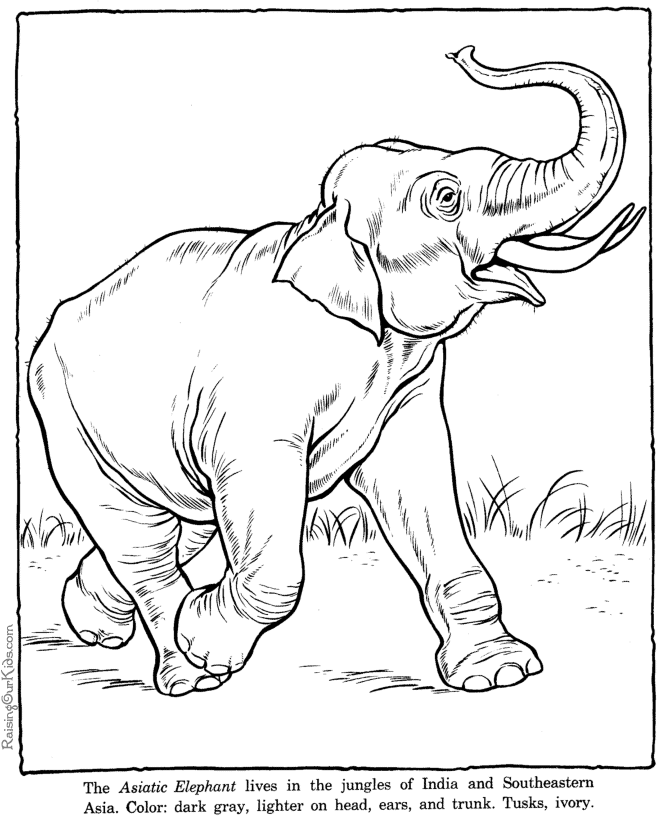
What habitats do you think the animals below live in? Save and print some of the pictures to practice drawing parts of their natural environments.

Week of May 11th:
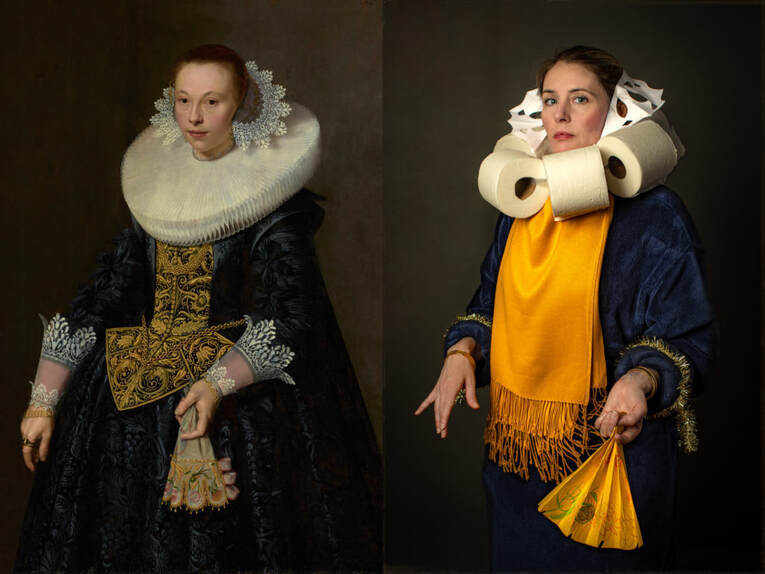
Recreate two famous works of art of your choosing.
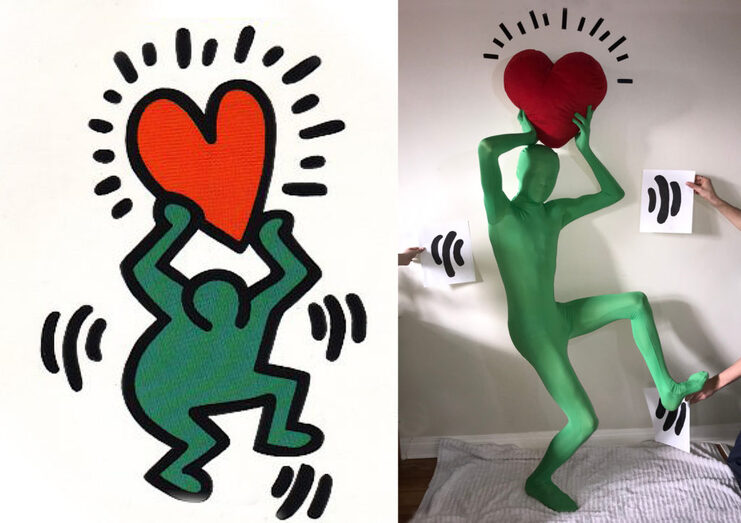
After checking out the websites below, choose two famous art works that inspire you. Look at them very closely and think about the following:
What colors did the artist use?
What is the subject (what is the artwork about?)
What details do you notice that will help you recreate it using object you find around the house?
Think about who can help you model at your house if there are people or animals in the picture or ask a family member to photograph you posing!
Kid friendly links to art museums (copy and paste in your browser):
https://www.metmuseum.org/art/online-features/metkids/explore
https://www.tate.org.uk/kids/explore/whos-who
I'd LOVE to see what you come up with! Snap a pic and email to Mrs. Alseri at:
[email protected]
Animal Mash-Up
Fishbird
Create a new type of creature by combining parts from two different animals. Give your creature a name!
Supplies:
Blank paper
Pencil
Tips and how to:
1.Make a list of some animals that have different body shapes before starting to draw. Think about wings, tails, legs, and types of feet. Details are important to make a convincing creature!
2. Choose two of the animals from your list that are very different. Find some pictures of the animals.
3. Decide what body parts you're going to mix up and build a new creature! If you're stuck, start with the body and go from there.
Name Color Wheel (from kinderart.com)
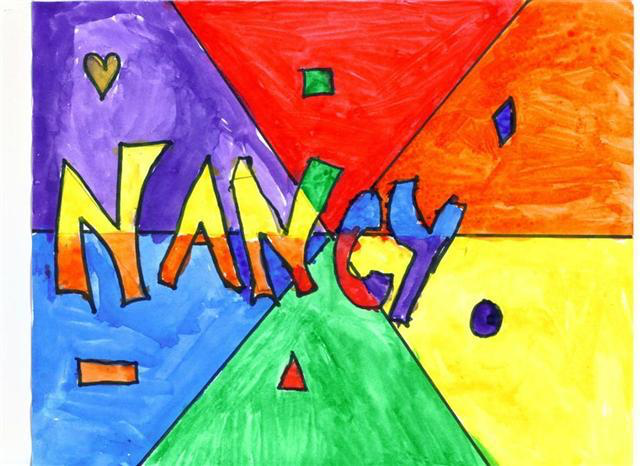
Complimentary colors are colors that are opposite on the color wheel. The three pairs of basic complimentary colors always include one primary color and one secondary color.
Red+Green
Blue+Orange
Purple+Yellow
Artists use complimentary colors when they want contrast or really want to make something stand out.
Supplies:
Blank Paper
Ruler
Pencils
Marker (black)
Watercolor or tempera paint, crayons or markers
Steps:
1. Using a ruler and a pencil (drawing lightly), divide the paper into 6 parts (as per examples)
2. Students center their names (using pencil) in block lettering.
3. Students then outline their names in black marker.
4. Color each section as a color wheel.
5. Color those parts of the letters that fall within the boundaries of a color wheel section the appropriate complementary color.
6. Re-outline using black marker if necessary.
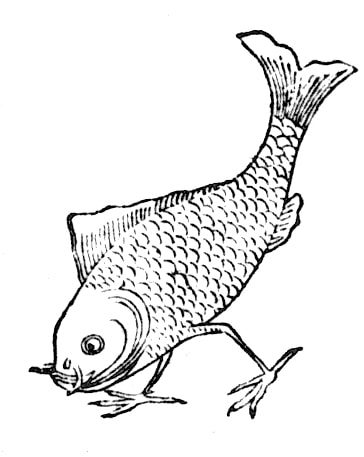
Koi Fish Drawing
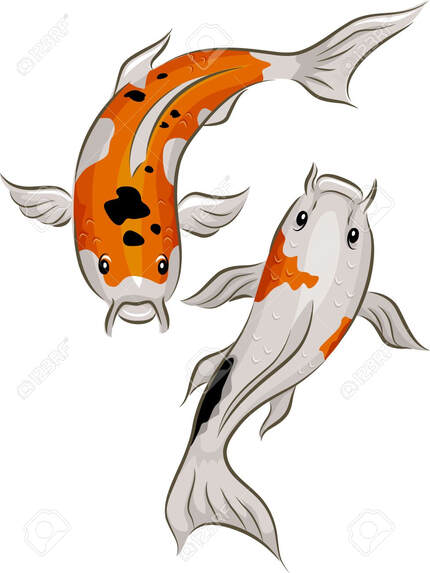
Koi fish in Japanese culture are often associated with good fortune or luck. Koi are distinguished by their long fins and tails. When two koi are depicted side by side (like in the above picture), it is called a 'half moon' shape.
Supplies:
Blank paper
Pencil and eraser
Colored Pencils or Markers
Supplies:
Blank paper
Pencil and eraser
Colored Pencils or Markers
Steps:
1. Holding your paper tall, draw a long skinny oval that is smaller at the bottom.
2. To make the tail, draw two fins at the bottom that are long and pointy. Make them really long and curvy for a fancy fish!
3. On the middle of each side, draw a triangle that sticks out. These can also be longer to give your fish some drama!
Draw the lateral fin as two long sweeping lines down the back.
4. Now you're ready for the eyes. Since we are looking at the fish from above, draw two eyes at the very top of the oval where the head will be. The eyes are close to the sides of the head.
5. For a mouth, make an upside down rainbow right below to tip of your oval, between both eyes.Draw two curvy lines coming out on both sides of the mouth for whiskers.
6. Add scales around the body by drawing little letter 'U's'. Some koi even have spots on their skin.
7. Color it! Think about goldfish that you have seen. They can be orange, black, white or all three combined.
